Keeping in mind that I don't like to sew:
I'm always in a hurry, and it was time to set the clocks back. . . .
I managed to make two owls in two hours and they measure about 8 inches tall.
While the photo is self-explanatory, I recommend using left over scraps from the last project you gave up on.
The crazier the fabric pattern, the better.
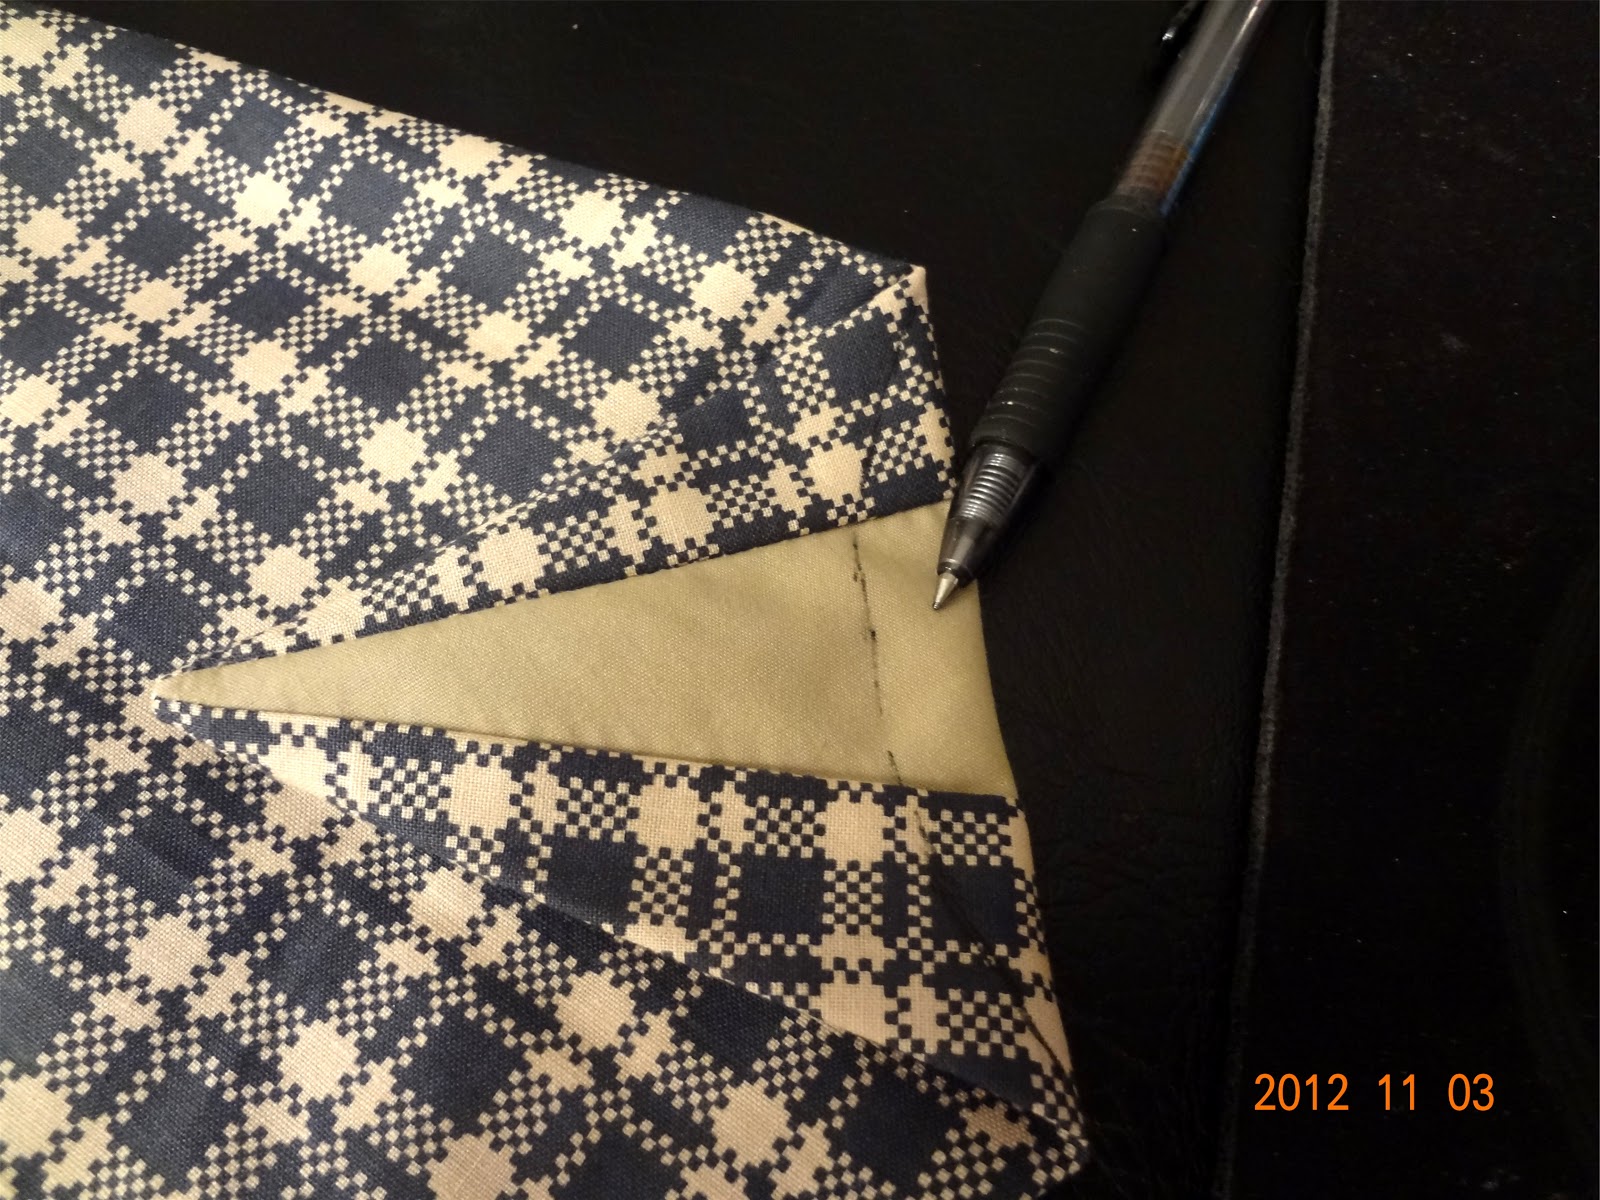
The tan will be the owl's belly. Sew it to the side panels.
Iron the seams toward the darker fabric.
MAKE SURE the belly and sides come to a perfect point. . . . .
because. . . .
The point will be the BEAK!
YAY! Now iron that sucker down.
This is the place where most people stop.
But I've never seen a flat headed owl and I'm not going to make one.
This might get a wee bit confusing, but you're tough.
You'll hang in there.
Flip the beak over to the backside and draw a curve from one edge ("horn") to the other edge.
Sew the curve. Wheeeeee.
Yep. It'll look like this.
Iron it again. *sigh*
And see the horns? Much better than a flathead.
Leaving an opening you can turn inside out.
Still here? My, you ARE tough, aren't you.
Now things get a little bit screwy.
But it will work out in the long run.
Make the eyeballs ROUND if you want to,
but I'm going to show you how to make an angry owl
So make little Beggar Purses out of the eyes,
then sew closed along the STRAIGHT edge.
Okay now. I'm getting tired of sewing.
Let's get out the Aleen's fabric glue.
The tube of glue decided to burp at just the right moment.
But nevermind.
We're going to glue these onto the eyeballs we just finished sewing.
Straight edge, to straight edge.
*lost photo should be here*
I'm just laying the eyes down to give it a check-o.
This would be THE perfect time to sew black buttons at the top of the eyeball, but do you SEE buttons?
No?
Well, just another thing I forgot to do.
Flip them over and add glue. . . .
Make sure YOUR little black buttons have been securely sewn on at this stage.
Then iron those suckers onto the head.
If you see any glue, don't worry. It dries clear.
I ran LONG basting stitches around the bottom and started shoving batting inside.
Then I pulled the basting stitches closed underneath the owl.
Stitched those tightly into what looks like a puckered little owl butt and let the Mrs. meet the Mr.
And glue also works on buttons.
I was in a hurry and the Mrs has an odd looking tummy,
but don't we all.